Many organization now depends upon business emails client as they provide a better environment for the organization to maintain their data. Office 365 is one of the most commonly used business email clients among many others. It’s all because of its functionality and wide range of application inbuild in one platform. The biggest advantage of Office 365 online is for the organizations who previously use Outlook email client. As they are familiar with the working environment of Outlook, it becomes easy for them to use Office 365 Outlook. Therefore, we have come up with the best way to import PST to Office 365 Outlook without any hassle.
We have seen many business professionals asking about the quickest way to import their Outlook PST file into Office 365 account. Below are the few queries for a quick overview:
Barry Campbell Asks on Twitter – “Hello, We are about to embark on a switch from Outlook email client to Office 365. There are about 200 mailboxes and all of them have locally stored .pst file. We have been using Outlook for over a decade and there are multiple emails in each user mailbox. Someone suggest me the ‘Network Upload’ method, but it is too hard to implement. We are looking for the best way using which we can easily import PST to Office 365. Please tell me the quickest way to solve my problem. Thanks…”
Step 1: Create PST File in Outlook
1. Open MS Outlook account
2. Go to File and click on Open
3. Now, choose the Import/Export option from the list

4. From the list of options choose “export to a file” and click Next.

5. In Export to a File wizard, choose “Outlook data file (.pst)” and click Next

6. Choose the mailbox of Outlook you need to import to Office 365

7. Browse the destination location for the PST file and click on Finish button

Note: We have had reports that moving large size PST files to Office 365 makes Outlook crash. It is highly recommended to break large size .pst files in small size (2 GB or lesser).
Step 2: Import PST to Office 365
There are now two methods using which you can easily import your generated PST file into the destination Office 365 account. First, by using a professional tool that is highly recommended by the Microsoft MVP. Second, Manually importing a PST file one at a time into Office 365 account using Imap configuration.
Method #1: Professional Solution for Importing PST to Office 365 Accounts
The fastest and safest method which is recommended by the Microsoft MVPs for Office 365 users is by using automated tools like SysTools PST to Office 365 Migration tool. This software is capable to import multiple PST files into Office 365 account. Users can map each .pst file with their destination Outlook account. Using this software you can also import PST to Office 365 shared mailbox without any hassle.

Following are the top features provided by the tool
- Import multiple Outlook data file (.pst) into Office 365
- Incremental import option to move new or update data from PST file.
- Multiple filter options for importing selected data from PST file.
- Import PST to Office 365 shared mailboxes
- Maintain folder hierarchy the same as PST file.
- Multiple options to Import PST files; Add File / Folder / CSV option.
- Generated a complete migration report after importing is finished.
Step-by-Step procedure to Import PST to Office 365 Account
1. Download and Install Office 365 Import wizard
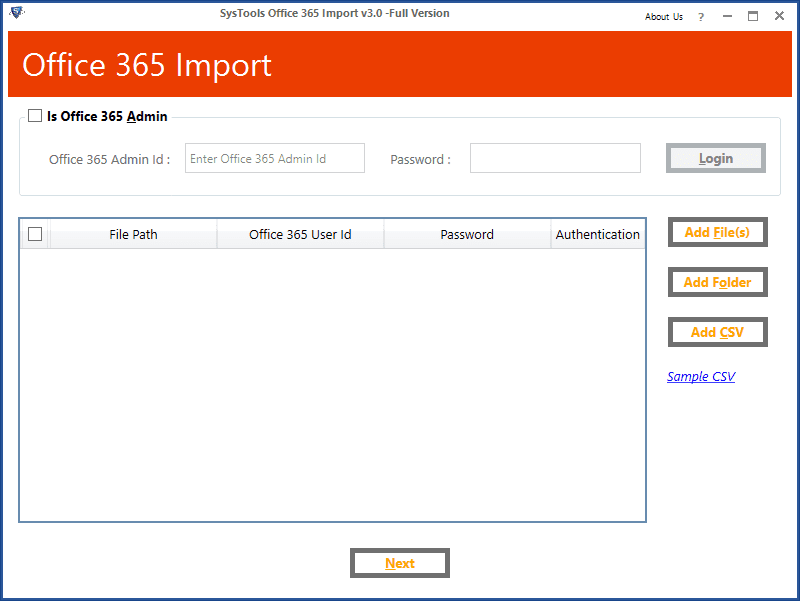
2. Enter the Office 365 Admin or User credentials for Login
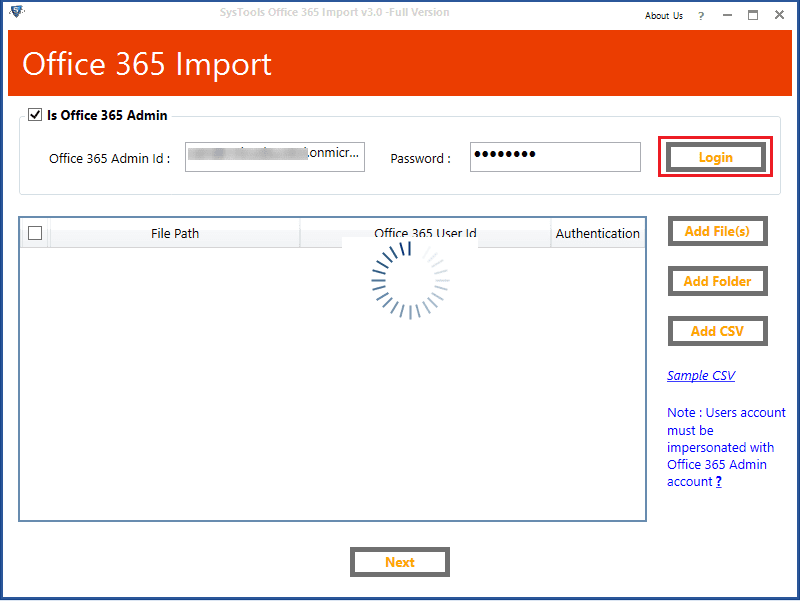
Note: Login via admin credentials to import PST file to multiple Office 365 accounts and also to enable import PST in Office 365 shared mailbox
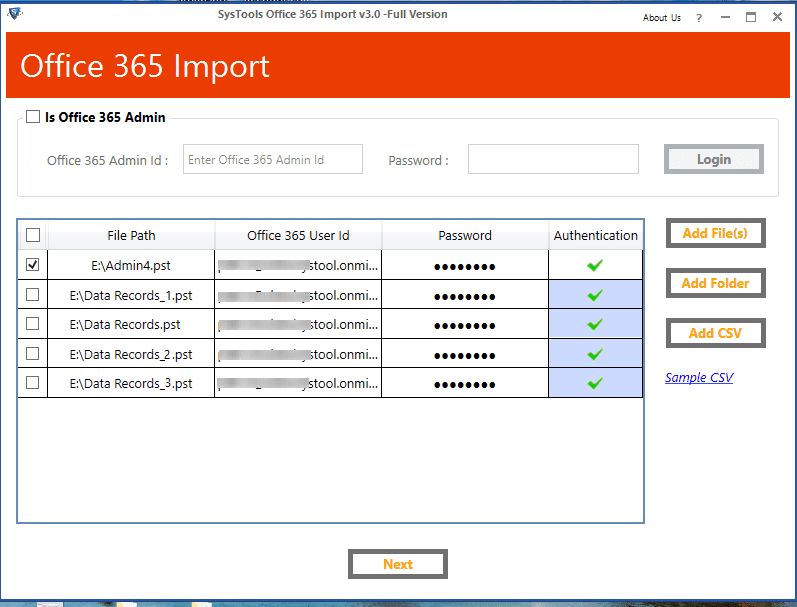
3. Choose a option from Add File(s) / Add Folder / Add CSV to import PST file.
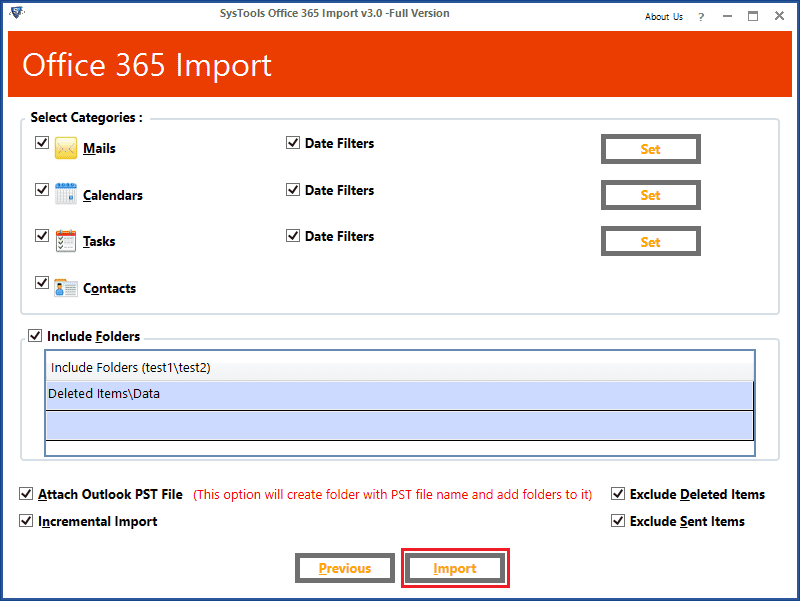
4. Select the Category of data you need to import from PST file and Apply Date filter for each selected category
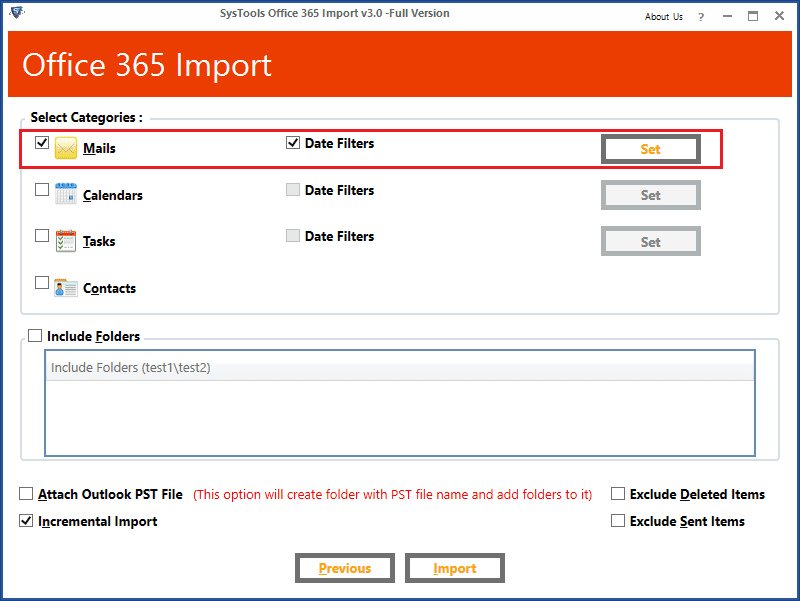
4. Use Include folder, Incremental Import option for filtering data.
5. Click on the Import button to start the process of Importing PST to Office 365 account.
Method #2: Free Method to Import PST to Office 365
The free method we have discovered for importing your Outlook PST file to Office 365 is by using IMAP configuration. Using this method, the user can only import a single PST file into an Office 365 account.
Important Note: If you are looking for a method to import PST to Office 365 account of multiple users then skip to the next method.
IMAP Configuration Steps to Import PST to Office 365
1. Open MS Outlook
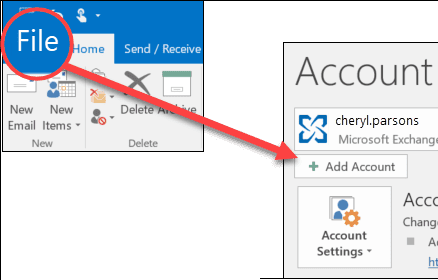
2. Go to File Option, after that choose Add Account option.
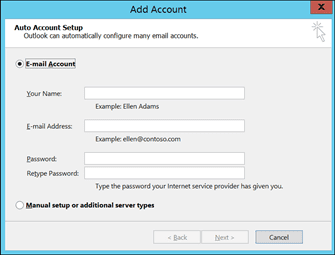
3. Enter the details of your Office 365 account and click on Connect
4. Wait and let the Office 365 account syncronize in Outlook. (It can take hours or day to configure)
5. After the configuration is finished, Go to File again and click on Open option

6. Now, choose Import/Export option
7. From the list, select “Import from another program or file” option and click Next.

8. Choose “Outlook data file (.pst)” option from the list and click Next

9. Browse the PST file location and click Next

10. Choose the destination ID folder for import PST to Office 365

Note: Again it will take some time to import your PST file into destination Office 365 account. If you have multiple accounts where you wish to import PST file then repeat this method again.
Conclusion
For the ease of business email client users such as Office 365, we have created this blog which covers the best way to import PST to Office 365. If you are facing difficulty while using the Network upload method then this guide is perfect for you. We have explained two methods, the first method is suggested by Microsoft MVP and the other is the method we have discovered. Read the complete blog carefully to get a better understanding of both the methods.
Read Posts
hands laptop -DepositPhotos


